 展开
展开

系统:WinAll 大小:2.9M
类型:系统其他 更新:2016-05-25

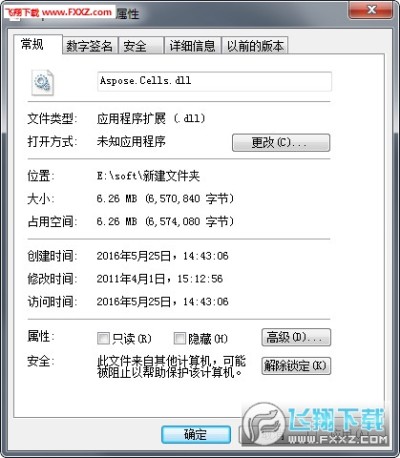
Aspose.Cells.dll Aspose.Cells.chm超级好用 导出excel速度杠杠的,API也有注释,操作Excel的利器,不需要微软的office支持。
Aspose.Cells包含有一个类库,支持所有Excel格式类型的操作。它是一个非图形表格管理库,可适用于任何类型的应用程序(ASP.NET Web应用程序或Windows桌面应用程序)。此外,组件也可以用于如ASP,PHP和Python的一些其他的解决方案等
Aspose.Cells提供了灵活的组件,能够用.NET应用程序来创建和管理,在服务器上安装而不需要Microsoft Excel电子表格。 功能丰富的组件,提供的不仅仅是基本数据的输入和输出。 有了这些组件开发人员可以导入和导出每一个具体的数据,表格和格式,在各个层面导入图像,应用复杂的计算公式,并将Excel的数据,保存为各种格式等等。
Aspose.Cells允许开发人员创建和管理Excel, 而不需要安装Microsoft Excel或者Microsoft Office Excel。 所有Aspose组件是完全独立的,无隶属关系,也没有授权,赞助,或以其他方式的微软公司批准。 总之Aspose.Cells是一个更好的选择 , 自动化 ,安全,稳定,可扩展性延伸,速度快,功能强大。
1.创建Workbook和Worksheet
workbook&worksheet1
Workbook wb = new Workbook();
wb.Worksheets.Clear();
wb.Worksheets.Add("New Worksheet1");//New Worksheet1是Worksheet的name
Worksheet ws = wb.Worksheets[0];
如果直接用下边两句则直接使用默认的第一个Worksheet:
workbook&worksheet2
Workbook wb = new Workbook();
Worksheet ws = wb.Worksheets[0];
2.给Cell赋值设置背景颜色并加背景色:
cell1
Cell cell = ws.Cells[0, 0];
cell.PutValue("填充"); //必须用PutValue方法赋值
cell.Style.ForegroundColor = Color.Yellow;
cell.Style.Pattern = BackgroundType.Solid;
cell.Style.Font.Size = 10;
cell.Style.Font.Color = Color.Blue;
自定义格式:
cell2
cell.Style.Custom = "ddd, dd mmmm 'yy";
旋转字体:
cell3
cell.Style.Rotation = 90;
3.设置Range并赋值加Style
range1
int styleIndex = wb.Styles.Add();
Style style = wb.Styles[styleIndex];
style.ForegroundColor = Color.Yellow;
style.Pattern = BackgroundType.Solid;
style.Font.Size = 10;
//从Cells[0,0]开始创建一个2行3列的Range
Range range = ws.Cells.CreateRange(0, 0, 2, 3);
Cell cell = range[0, 0];
cell.Style.Font = 9;
range.Style = style;
range.Merge();
注意Range不能直接设置Style.必须先定义style再将style赋给Style.其他设置和Cell基本一致.Range的Style会覆盖Cell定义的Style.另外必须先赋值再传Style.否则可能不生效.
4.使用Formula:
formula1
ws.Cells[0,0].PutValue(1);
ws.Cells[1,0].PutValue(20);
ws.Cells[2,0].Formula="SUM(A1:B1)";
wb.CalculateFormula(true);
Save Excel文件的时候必须调用CalculateFormula方法计算结果.
5.插入图片:
pictures1
string imageUrl = System.Web.HttpContext.Current.Server.MapPath("~/images/log_topleft.gif");
ws.Pictures.Add(10, 10, imageUrl);
6.使用Validations:
validations1
Cells cells = ws.Cells;
cells[12, 0].PutValue("Please enter a number other than 0 to 10 in B1 to activate data validation:");
cells[12, 0].Style.IsTextWrapped = true;
cells[12, 1].PutValue(5);
Validations validations = totalSheet.Validations;
Validation validation = validations[validations.Add()];
//Set the data validation type
validation.Type = ValidationType.WholeNumber;
//Set the operator for the data validation
validation.Operator = OperatorType.Between;
//Set the value or expression associated with the data validation
validation.Formula1 = "0";
//the value or expression associated with the second part of the data validation
validation.Formula2 = "10";
validation.ShowError = true;
//Set the validation alert style
validation.AlertStyle = ValidationAlertType.Information;
//Set the title of the data-validation error dialog box
validation.ErrorTitle = "Error";
//Set the data validation error message
validation.ErrorMessage = " Enter value between 0 to 10";
//Set the data validation input message
validation.InputMessage = "Data Validation using Condition for Numbers";
validation.IgnoreBlank = true;
validation.ShowInput = true;
validation.ShowError = true;
//设置Validations的区域,因为现在要Validations的位置是12,1,所以下面设置对应的也要是12,1
CellArea cellArea;
cellArea.StartRow = 12;
cellArea.EndRow = 12;
cellArea.StartColumn = 1;
cellArea.EndColumn = 1;
validation.AreaList.Add(cellArea);
7.将数据导入指定区域
cells.ImportDataTable(dt1, false, "B4"); //将结果集从EXCEL中第B列第4行的位置开始导入
8.设置统计列
//设置工作表的第4行第K列为一个统计列
//cells[3, MES.Common.Excel_GetColumnIndex("K")].Formula = "=SUM(B6:B" + dt.Rows.Count + 6 + ")";
cells[2, 1].Formula = "=SUM(B4:B5)";
9.设置该样式的4个边框线的样式
//style.Borders[BorderType.LeftBorder].LineStyle = CellBorderType.Thin;
//style.Borders[BorderType.TopBorder].LineStyle = CellBorderType.Thin;
//style.Borders[BorderType.RightBorder].LineStyle = CellBorderType.Thin;
//style.Borders[BorderType.BottomBorder].LineStyle = CellBorderType.Thin;